Magento
Magento is a popular content management system that allows creating powerful e-commerce solutions. As a matter of fact, every e-commerce website should have a reliable support system that helps to quickly solve any issue, build strong customer relationships and improve overall user experience. Integrating DiamanteDesk with a website built with Magento may be the easiest solution for that.
DiamanteDesk Magento module allows both administrator and any customer to create, edit and view tickets directly on a Magento e-commerce website.
Installing DiamenteDesk Extension
After installing DiamanteDesk integration module, it shall be configured at the Magento admin panel.
- Log in the Magento Admin Panel.
- In the navigation panel select Systems > Magento Connect > Magento Connect Manager.
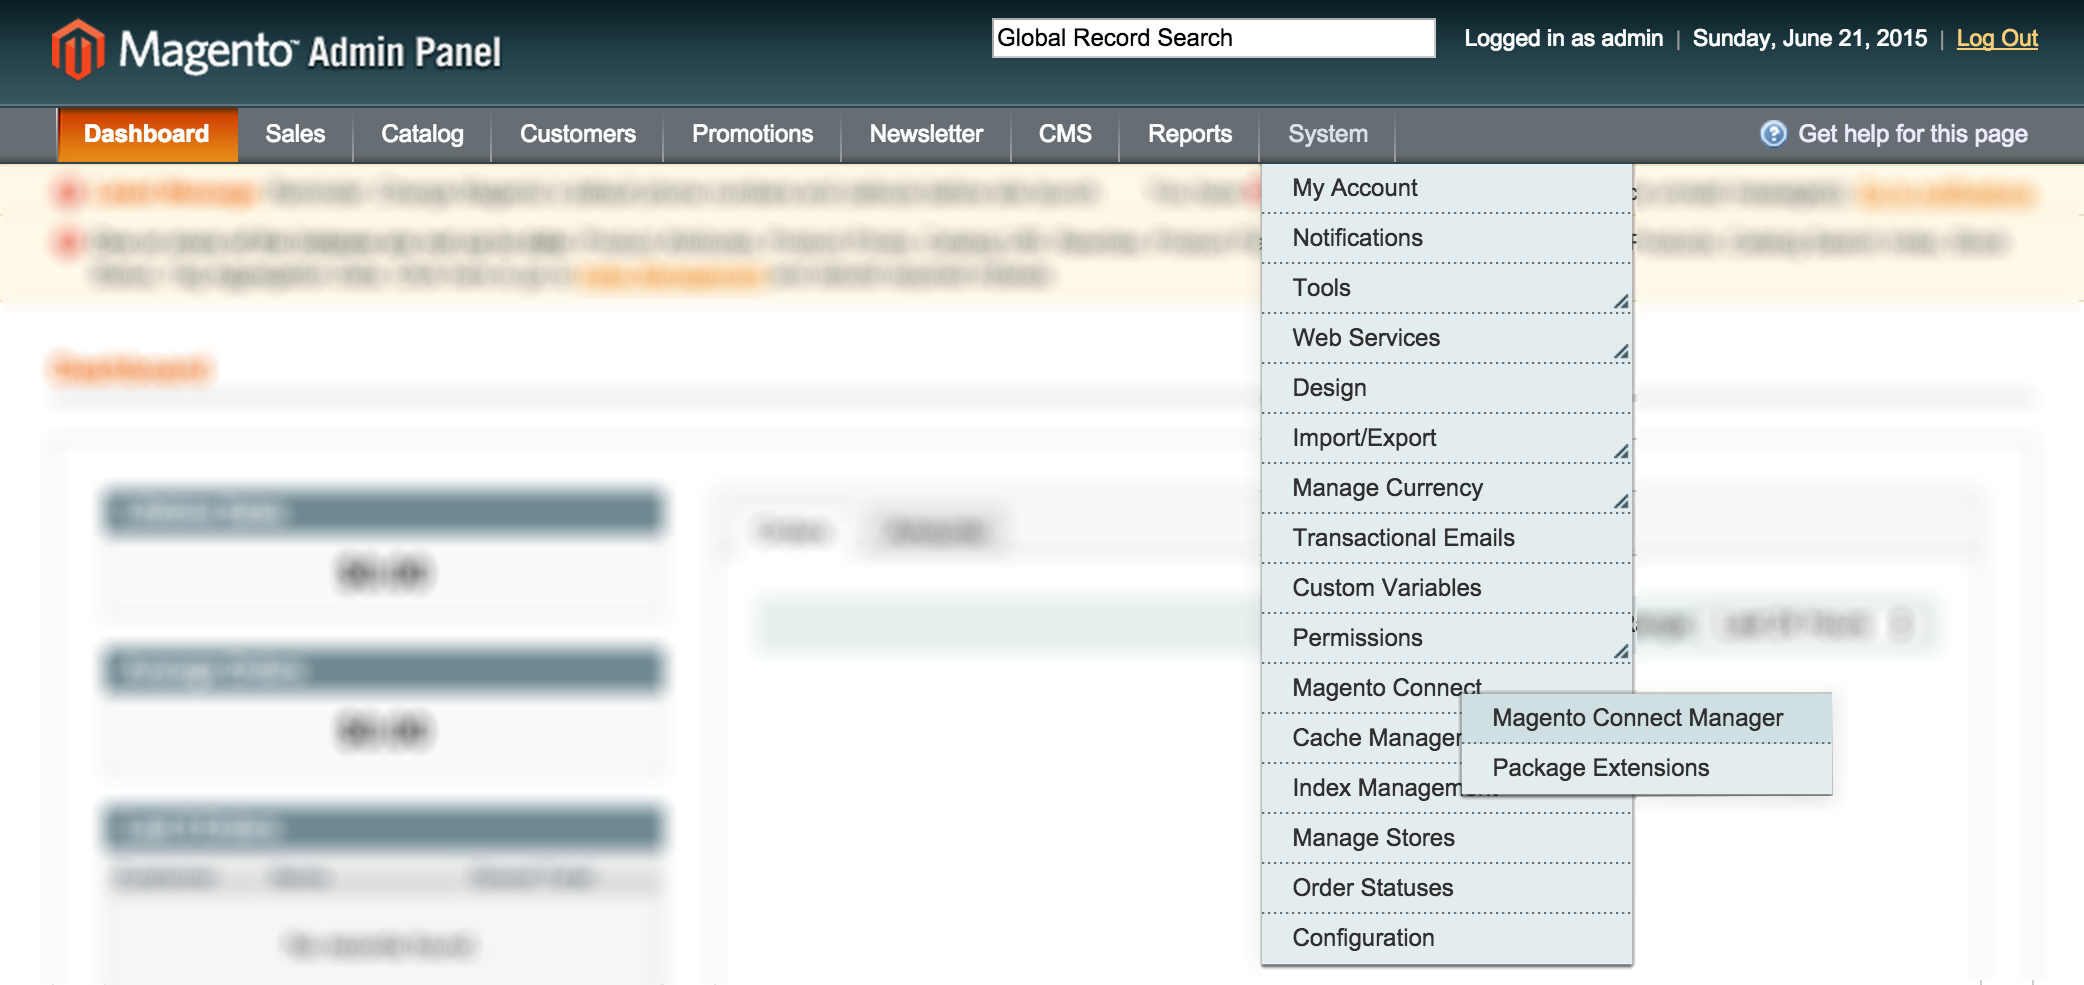
- Re-enter your Magento Administration credentials to verify your permissions.
Select automatic or manual installation and complete the following steps:
Automatic Installation
- On the Magento Connect Manager screen follow the Magento Connect link in the Install New Extensions section.
 The extension marketplace opens.
 - Enter DiamanteDesk in the Search for Extensions field and press Enter.

- Select the corresponding extension module from the search results.
- Click Get Extension.
Manual Installation
Option 1 - Installation via FTP:
- Upload the addthis folder to the root Magento directory.
- Head over to the Magento admin area and connect DiamanteDesk and Magento (see the Connecting DiamanteDesk to Magento section).
Option 2 - Installation via archive:
- Download DiamanteDesk Module archive from Github.
- On the Magento Connect Manager screen, Extensions tab head over to the Direct package file upload section.

- Select the downloaded DiamanteDesk .zip file from the local machine.
- Click Upload.
- Provide your Magento Administration Credentials in the Manage Existing Extensions section below.
- After all the packages have been uploaded, move to Settings tab, and click Save Settings.
Option 3 - Installation via Composer:
- Add Firegento repository to your
composer.json. Add as dependency to your project using composer:
composer require eltrino/diamantedesk
Note:
Make sure that you clear the Magento caches to complete the installation of an extension. To learn more about cache management, follow this link.
If the module has been successfully installed, a DiamanteDesk tab will appear next to the System tab in the Magento navigation pane (see the picture below).

Connecting DiamanteDesk to Magento
After DiamantDesk module has been installed, we need to connect the actual help desk to Magento.
In order to do that, complete the following steps:
- Acquire API credentials from your CRM.
- Get back to Magento Admin Panel.
- Go to System > Configuration > DiamanteDesk. DiamanteDesk configuration screen opens.
- Enter the User Name and Api Key from your CRM.
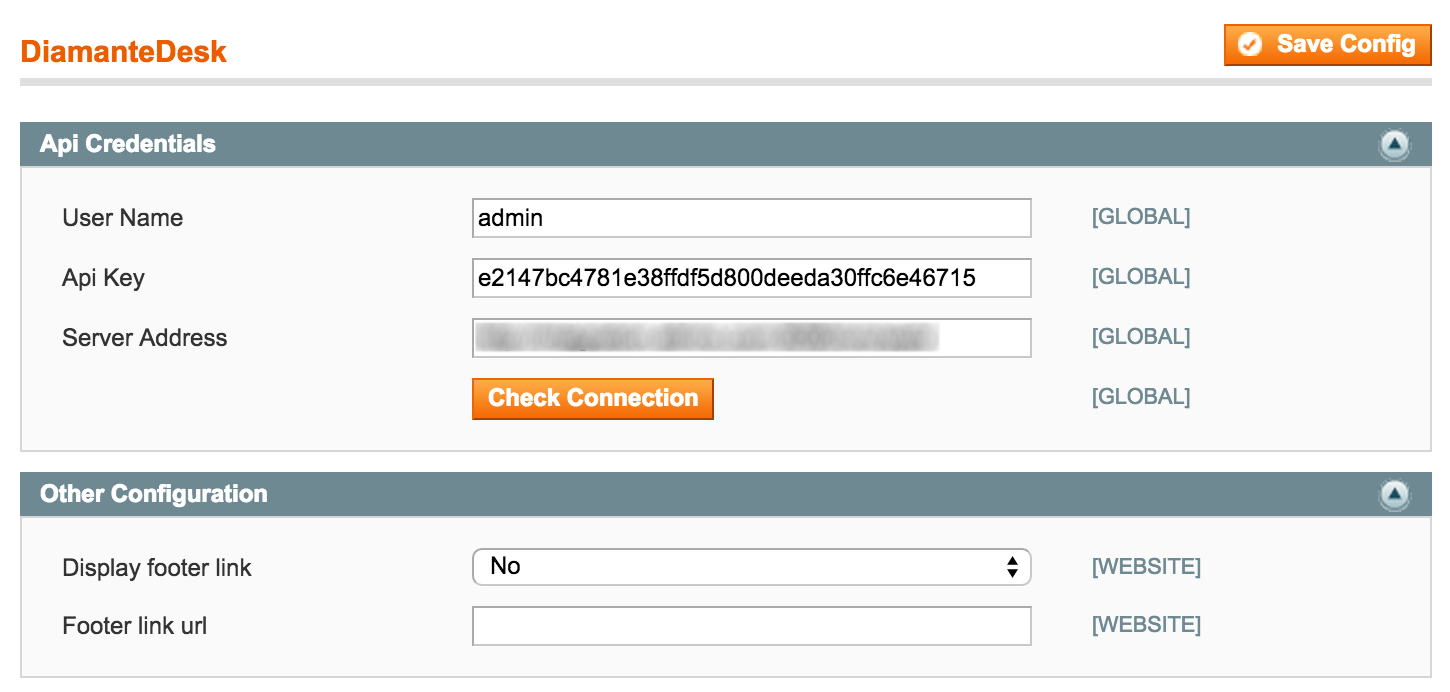
- Provide the link to the server in the Server Address field.
- Click Check Connection to make sure that the connection with a server has been successfully made.
- If the Api Credentials are correct, a new Branch Configuration field will be added to the DiamanteDesk configuration. Select a default branch from the Branch drop-down list. To learn more about branches in DiamanteDesk, see the Branches section in User Guide.
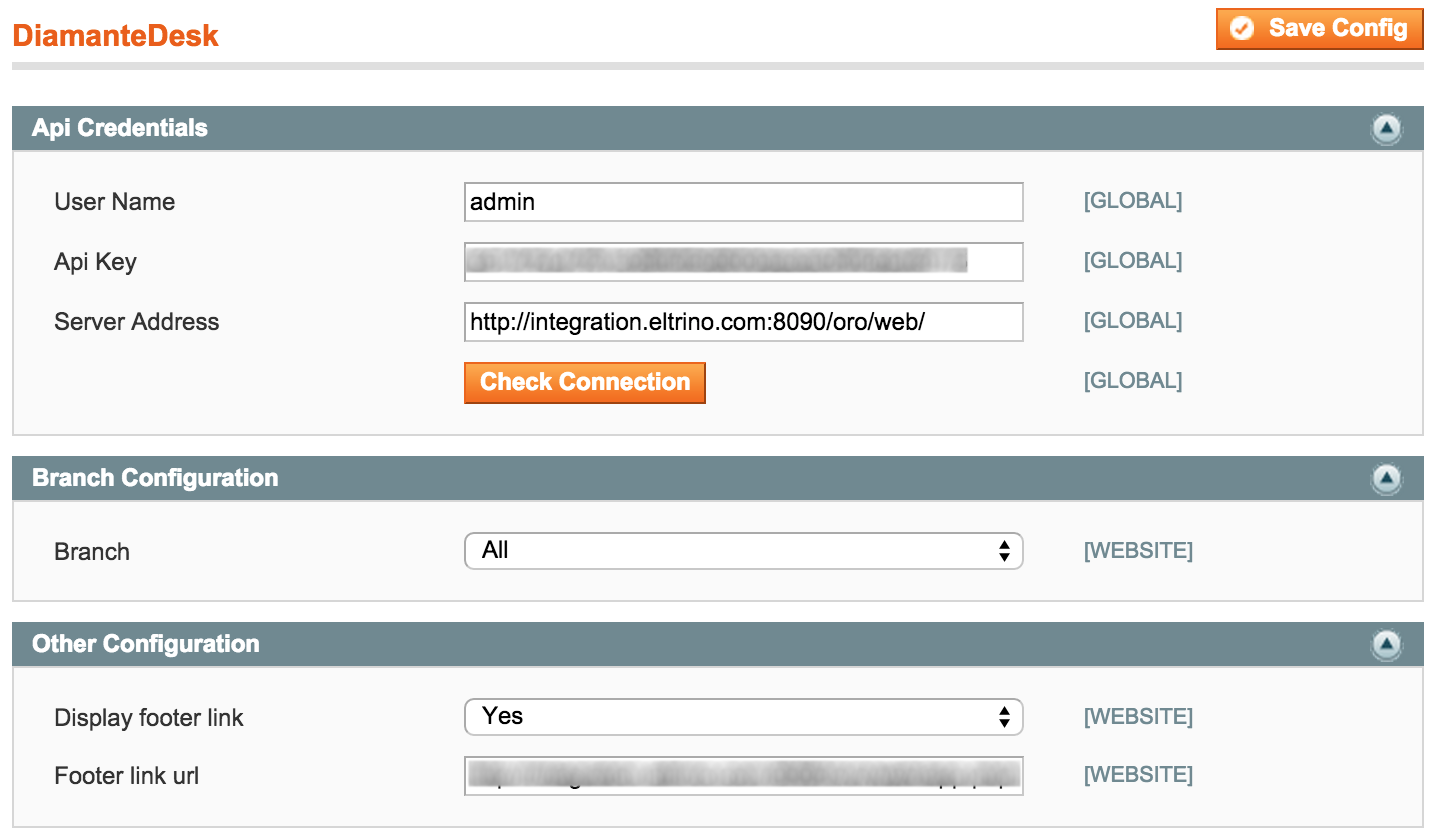
- Point out whether the footer link to customer support shall be displayed. Select Yes or No option in the Display footer link field.
- If the footer link shall be displayed, spcify the footer link URL in the field below.
- Click Save Config on the right top corner of the screen.